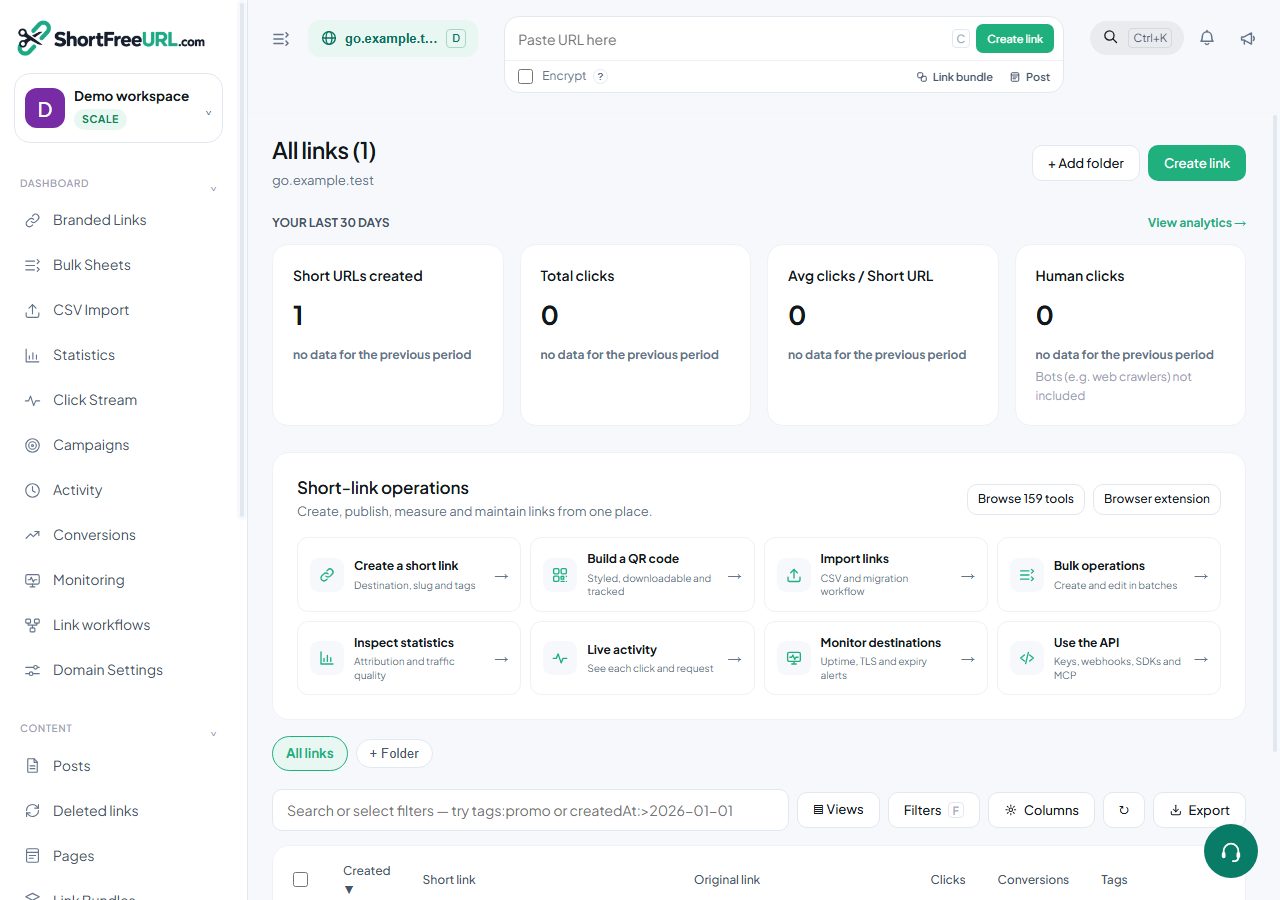
The dashboard is organised around one domain at a time. The domain switcher at the top left decides what the links table, statistics and folder list show.
Links table
The table lists non-archived links on the current domain, newest first. Sorting is available on created date, updated date, clicks, conversions, title, slug and expiry. Paging is offset-based, up to 150 rows per page.
The search box accepts plain text — matched against slug, title, destination and tags — and a field syntax:
path:spring title:"Spring sale" tag:promo
clicks:>500 created:>2026-01-01 expires:none
archived:true cloaking:true redirecttype:301 by:priya@acme.com
Terms combine with AND. Adding archived: anywhere in the query turns off the default filter that hides archived links.
Selection and bulk actions
Select rows and the bulk bar appears: delete (maximum 150 at a time), archive, unarchive, add or remove tags, set UTM values, set expiration, move to folder, update fields such as redirect type and cloaking, duplicate to another domain, and export the selection as CSV.
Folders and tags
Folders belong to a domain and can carry defaults — redirect type, QR style, tracking code, UTM values and an auto-delete period — applied to every link created inside them. Tags are free text with no hierarchy; the tag list is derived from the links themselves and doubles as autocomplete.
Statistics
Statistics has its own page per domain and per link, plus an organisation-wide overview on the home screen. Every card obeys the current date range and filters.
Elsewhere in the navigation
- Bulk — CSV import, the in-browser bulk sheet, exports and the Bitly migration guide.
- QR codes — the studio, published codes and bulk export.
- Bundles and Posts — a link-in-bio page and a markdown page, each living on a short link of its own.
- Settings — profile, organization, teams, API keys, integrations and audit log.
Keyboard shortcut C opens the create dialog from anywhere.
Find this in your dashboard
- Sign in and select the workspace and domain you want to manage.
- Open Branded Links. Review the article’s steps and your plan’s available controls.
- Save your changes, reopen the record and verify the saved result. For routing changes, check the short link with a test visit.